
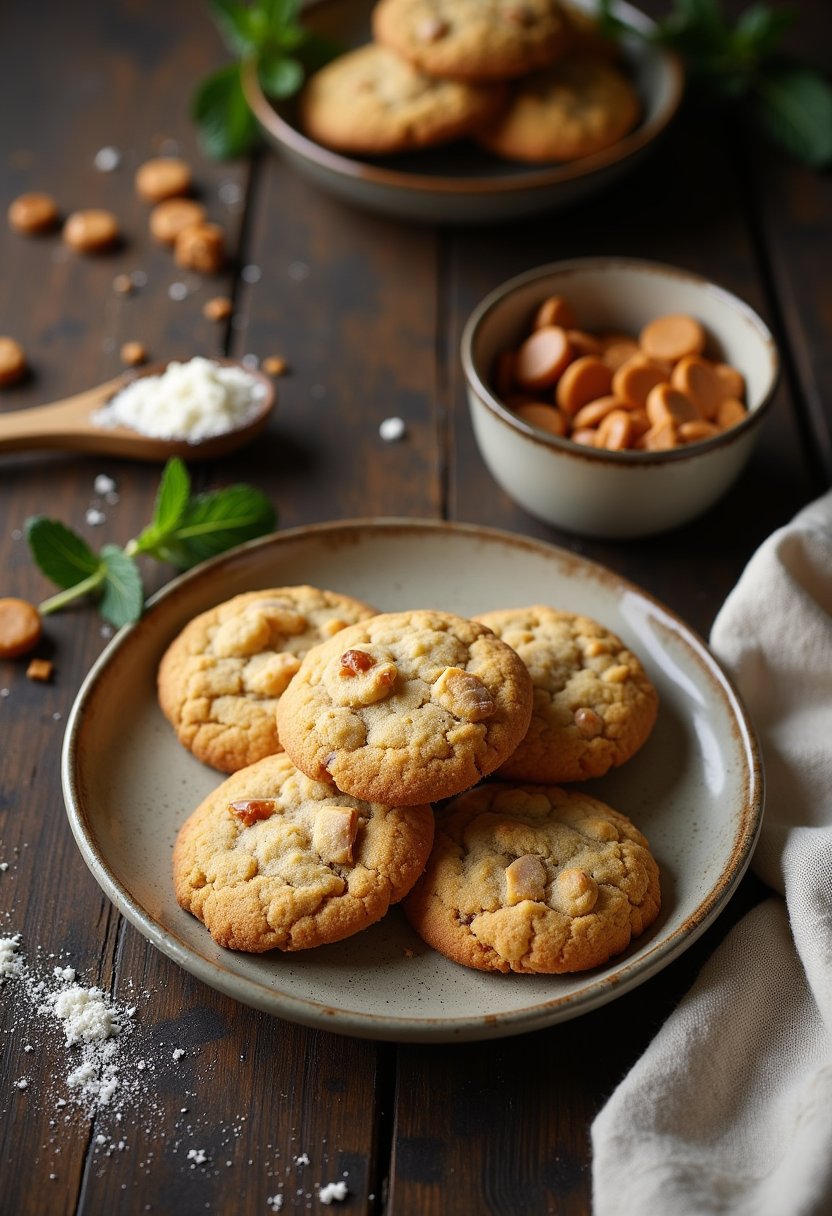
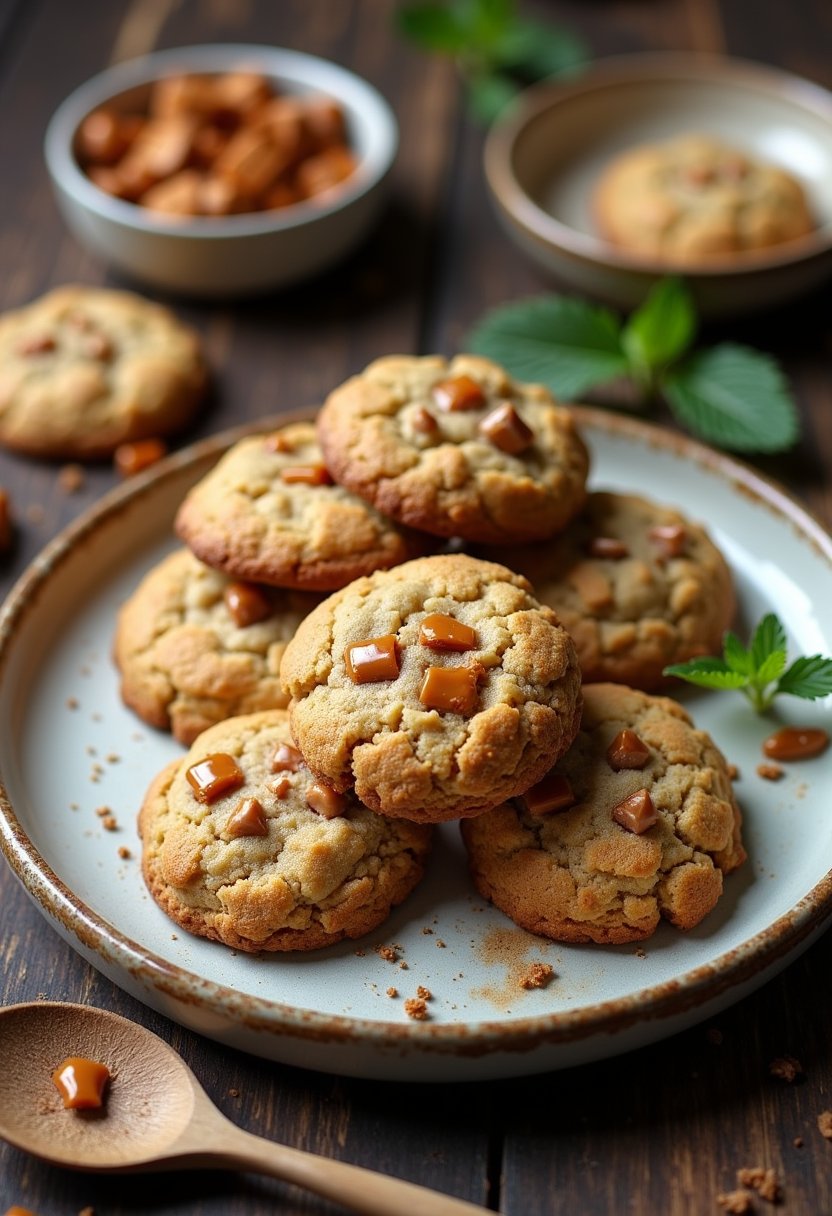
Picture this: a cookie that’s crisp around the edges, delightfully chewy in the center, and bursting with rich, nutty flavors that make you want to keep the cookie jar within arm’s reach at all times. Enter the Brown Butter Toffee Cookie—a confection that seems to whisper sweet nothings to your taste buds with every bite.
These cookies are the result of a beautiful culinary transformation, where simple butter is browned to perfection, morphing into a golden, aromatic elixir. The aroma of nuttiness fills the kitchen and captivates your senses even before the first batch is out of the oven. The toffee pieces add a caramelized sweetness and a subtle crunch, making each mouthful a mini adventure of textures and tastes. Imagine a symphony where the brown butter plays the deep, mellow notes, and the toffee chimes in with a lively, sugary melody.
Now, why should you make these cookies? Besides their irresistible taste, they’re also a perfect example of how a few tweaks can elevate a classic dessert to gourmet status. They’re ideal for impressing guests or indulging in a quiet moment of self-care. Plus, the recipe is approachable for all skill levels. If you can wield a whisk and manage a stove, you’re well on your way to cookie greatness. With a prep time of about 20 minutes and a total baking time that barely surpasses half an hour, you’ll have a batch ready before the anticipation drives you to nibble on the raw dough! So, preheat that oven and get ready to fill your home with warmth and the heavenly scent of these luscious cookies.
The Story Behind This Recipe
Once upon a time, in a cozy kitchen tucked away in the heart of a bustling city, a culinary alchemist was on the quest for the ultimate cookie. This wasn’t just any cookie; it needed to have the perfect balance of chewy and crunchy, sweet and salty, with a depth of flavor that would make even the most discerning taste buds dance with joy. Thus, the Brown Butter Toffee Cookie was born, a creation that would soon become a cherished staple in cookie jars everywhere.
The journey to this delightful confection began with a simple nutty ingredient that transforms the ordinary into the extraordinary: brown butter. Known as “beurre noisette” in French, this golden elixir is butter cooked until the milk solids caramelize, imparting a rich, nutty aroma and flavor that makes everything it touches simply irresistible. The magic of brown butter offers a complexity that elevates these cookies to gourmet status.
To complement the brown butter, the recipe’s creator turned to toffee—those delightful little nuggets of buttery, caramelized sugar that add a satisfying crunch and an extra layer of sweetness. The combination of these two components seemed like a match made in heaven.
The origins of this particular cookie recipe are rooted in the desire to combine classic American cookie culture with a touch of European sophistication. It pays homage to the traditional chocolate chip cookie, while introducing elements that nod to a more refined palate. This isn’t just a cookie; it’s an experience—a sweet symphony of flavors and textures that have been meticulously orchestrated for your baking pleasure. And with every bite, you’re not just tasting a cookie; you’re savoring a little piece of culinary history.
Ingredients
For the Dough:
- 125 g (½ cup) unsalted butter, browned: This is where the magic begins! Start with quality unsalted butter—European if you can find it for that extra creamy goodness. Brown it gently in a saucepan over medium heat until it turns a glorious amber color and emits a nutty aroma. Watch it closely, as it can burn faster than a marshmallow at a campfire!
- 100 g (½ cup) granulated sugar: The classic sweetness that adds structure to our cookies.
- 100 g (½ cup) light brown sugar, packed: This sugar brings a delightful molasses undertone. If you’re in a pinch, dark brown sugar works too, though the flavor will be slightly richer.
- 1 large egg: Room temperature is best for even incorporation. If you forgot to take it out, a quick bath in warm water will do the trick.
- 1 teaspoon vanilla extract: Pure vanilla extract is preferred over imitation, trust me, your taste buds will thank you.
- 200 g (1 ⅔ cups) all-purpose flour: The backbone of our cookies. For a gluten-free option, a 1:1 gluten-free flour blend can often work wonders.
- ½ teaspoon baking soda: It helps the cookies rise and get that wonderful chewy texture.
- ¼ teaspoon salt: Balances the sweetness and enhances flavors. Use sea salt for a touch of sophistication.
For the Toffee Bits:
- 100 g (½ cup) toffee bits: These sweet nuggets are the heart of your cookies. If you can’t find them in stores, smash up some toffee bars like Heath or Skor. Be careful not to munch them all before they make it into the dough!
Optional:
- 50 g (½ cup) chopped nuts: Pecans or walnuts add a delightful crunch. Toast them lightly for even more flavor depth.
- Coarse sea salt, for sprinkling: A light dusting on top before baking adds a salty-sweet contrast that is utterly addictive.
Remember to have a large mixing bowl, a whisk, and a spatula at the ready. A cookie scoop or two spoons will help with portioning out your dough, ensuring every cookie is the same size. Happy baking, and may your kitchen be filled with the irresistible aroma of brown butter goodness!
Step-by-Step Instructions
- Gather Your Ingredients and Equipment
Start by collecting all the ingredients and necessary equipment. You’ll need a saucepan, mixing bowls, a whisk, a spatula, a baking sheet, parchment paper, and a cookie scoop or tablespoon. Preheat your oven to 350°F (175°C) and line your baking sheet with parchment paper. This will prevent the cookies from sticking and ensure even baking. - Brown the Butter
In a medium saucepan over medium heat, melt 225 grams (1 cup) of unsalted butter. Stir occasionally, keeping an eye out for the magical transformation. The butter will foam, and as the foam subsides, you’ll start to see brown specks forming at the bottom. This is the milk solids caramelizing, and it should smell nutty and heavenly. Once it’s a deep golden brown, remove from heat immediately to prevent burning, and pour into a heatproof bowl to cool slightly. - Mix Dry Ingredients
In a separate bowl, whisk together 250 grams (2 cups) of all-purpose flour, 1 teaspoon of baking soda, and ½ teaspoon of salt. Set aside. This ensures that the baking soda is evenly distributed, which helps the cookies rise properly. - Combine Sugars and Browned Butter
In a large mixing bowl, combine the cooled brown butter with 200 grams (1 cup) of granulated sugar and 150 grams (¾ cup) of packed brown sugar. Beat together until well combined, using either a stand mixer or a hand mixer. The mixture should be grainy but smooth, and the color should remind you of a sandy beach at sunset. - Add Eggs and Vanilla
Crack in 2 large eggs, one at a time, beating well after each addition. Then, add 2 teaspoons of pure vanilla extract. Your mixture should now be creamy and slightly fluffy, with a lovely golden hue. If you like, do a little taste test here for quality control (no shame in that!). - Incorporate Dry Ingredients
Gradually add the dry ingredients to the wet mixture, beating on low speed until just combined. Overmixing can lead to tough cookies, so as soon as you see no flour streaks, stop the mixer. - Fold in Toffee Bits
Gently fold in 150 grams (about 1 cup) of toffee bits with a spatula, ensuring they’re evenly distributed. The toffee adds a delightful crunch and a burst of caramel flavor in every bite. - Chill the Dough (Optional but Recommended)
For thicker cookies with a deeper flavor, cover the bowl with plastic wrap and chill the dough for at least 30 minutes in the refrigerator. If you’re in a hurry, you can skip this step, but your cookies might spread a bit more during baking. - Scoop and Shape
Using a cookie scoop or tablespoon, drop heaped tablespoons of dough onto the prepared baking sheet, spacing them about 2 inches (5 cm) apart. This gives the cookies room to spread out and ensures they bake evenly. - Bake the Cookies
Bake in the preheated oven for 10-12 minutes, or until the edges are golden brown and the centers are just set. They should still look slightly underbaked in the middle when you remove them from the oven, as they will continue to cook on the baking sheet. - Cool and Enjoy
Let the cookies cool on the baking sheet for about 5 minutes before transferring them to a wire rack to cool completely. This cooling time allows them to firm up just enough to handle without falling apart. Once cool, dive in and enjoy your perfectly chewy, nutty, and toffee-studded cookies.
And there you have it! Each bite is a delightful dance of nutty brown butter and crunchy toffee, making these cookies irresistibly delicious.
Tweaks and Additions
Are you ready to embark on a journey of cookie customization? These brown butter toffee cookies are like a blank canvas for your culinary creativity. With a few tweaks and additions, you can transform these delightful treats into a masterpiece that suits any mood or dietary need. Here are some scrumptious variations to consider:
1. Nutty Delights
For a nutty twist, consider folding in 100 grams (about 1 cup) of chopped pecans or walnuts alongside the toffee bits. The nuts add a delightful crunch and a deep, earthy flavor that complements the rich, buttery base. If you’re feeling adventurous, toast the nuts lightly in a dry pan before adding them to the dough. This toasting process intensifies their flavor and adds a lovely aroma. No changes to the baking time are needed—just keep an eye on your cookies to prevent the nuts from over-browning.
2. Chocolate Lover’s Dream
To satisfy your inner chocoholic, incorporate 150 grams (approximately 1 cup) of semi-sweet chocolate chips into the dough. The chocolate melds beautifully with the caramel notes of the brown butter and toffee, creating an indulgent experience with each bite. If you prefer a gooey texture, use chopped chocolate instead of chips for those coveted pockets of molten chocolate goodness. There are no adjustments needed for baking time, but be prepared for your kitchen to smell like a chocolate factory!
3. Gluten-Free Goodness
For a gluten-free option, swap the all-purpose flour with a 1:1 gluten-free baking flour blend. Brands like Bob’s Red Mill or King Arthur Flour offer reliable options that provide a similar texture to regular flour. You may notice a slight difference in the chewiness, but the flavor remains just as delectable. Check your dough’s consistency; if it seems too dry, add a tablespoon of milk (dairy or non-dairy) to help bind the ingredients. The cooking time remains unchanged.
4. Vegan Variation
For a vegan-friendly version, replace the butter with a plant-based alternative, such as Earth Balance or Miyoko’s Creamery. Additionally, substitute the egg with a flaxseed egg (1 tablespoon of flaxseed meal mixed with 2.5 tablespoons of water, left to sit until thickened). These changes slightly alter the taste, introducing a subtle nuttiness from the flaxseed, but the cookies remain deliciously tender. Baking time should stay the same, but ensure the cookies are firm before removing them from the oven.
5. Spiced Up Sensation
Add a pinch of cinnamon or cardamom to the dough for a spiced twist that enhances the warmth of the brown butter and toffee. Start with just 1/2 teaspoon and adjust to taste. These spices add an aromatic depth that makes the cookies perfect for cozy autumn evenings. No changes to the cooking technique are necessary, but your taste buds will surely notice the difference!
With these tweaks and additions, you can personalize your brown butter toffee cookies to delight any palate. Whether you’re catering to dietary restrictions or simply seeking new flavors, these variations promise an exciting and delicious baking adventure.
Decorating Tips
Ah, the pièce de résistance: decorating your brown butter toffee cookies. Now, before you roll up your sleeves and dive into embellishing these sweet morsels, let’s talk about how to elevate them from delightful to utterly decadent.
Drizzles and Dips
Sometimes, simple is best, and nothing says simple elegance like a chocolate drizzle. Melt about 100 grams (3.5 ounces) of good quality dark chocolate—70% cacao or higher is delightful—either in a microwave-safe bowl in 30-second bursts or gently over a double boiler. Once smooth, use a fork to drizzle the chocolate over cooled cookies in a zigzag pattern for flair. If you’re feeling particularly adventurous, dip half of each cookie into the chocolate instead. This not only looks enticing but adds a rich contrast to the nutty brown butter and sweet toffee.
Sprinkles and Sparkles
For those who believe there’s no such thing as too much sparkle, consider adding a sprinkle of flaky sea salt or crushed toffee bits on top of the chocolate before it sets. Not only does this add texture, but the salt enhances the sweet and savory notes of the cookie. Alternatively, a dusting of edible gold dust or shimmer will have your cookies gleaming like little treasures.
Nutty Accents
If you’re a fan of nuts, consider chopping up some toasted pecans or almonds to press into the tops of the cookies before baking. They adhere beautifully and give an extra layer of crunch that pairs perfectly with the toffee’s chewiness. Be sure to monitor for allergies if serving to guests, as not everyone can partake in nutty delights.
Seasonal Twists
Feeling seasonal? Add a touch of warm spices like cinnamon or nutmeg to your cookie dough for a comforting twist. For a festive look, a few dabs of royal icing in seasonal shapes—think leaves for autumn or snowflakes for winter—can transform your cookies into holiday showstoppers.
Storage and Transport Tips
Once decorated, allow the cookies to set completely. If you’re transporting these beauties, layer them gently with parchment paper in an airtight container to prevent any smudging or breaking. This ensures they arrive at their destination looking just as fabulous as when you created them.
Remember, decorating is your chance to express creativity and add a personal touch. Whether you go full-on gourmet or keep it simple, these brown butter toffee cookies are sure to impress with their irresistible aroma and taste. Happy decorating!
Serving Suggestions
Picture this: a plate of golden-brown cookies, their edges slightly crisp and centers chewy, the aroma of nutty brown butter mingling with sweet toffee. Truly, these Brown Butter Toffee Cookies are a temptation hard to resist. But how to serve them in ways that elevate their already delightful nature? Here are some suggestions to enhance your cookie experience.
Classic Pairings: Begin with the beloved classics. A tall glass of ice-cold milk is a timeless companion, offering a creamy contrast to the cookies’ rich flavor. Or, if you prefer something warm, a cup of freshly brewed coffee or tea can accentuate the buttery notes and provide a comforting balance to the sweetness.
Ice Cream Sandwiches: Transform these cookies into luscious ice cream sandwiches. Simply scoop your favorite ice cream (vanilla bean and salted caramel are particularly divine choices) between two cookies. Allow them a moment in the freezer to firm up, then indulge in this cool, creamy, and crunchy delight.
Cheese Platter Addition: For a sophisticated twist, consider adding these cookies to a cheese platter. The toffee’s sweetness pairs beautifully with creamy brie or a sharp cheddar, creating a symphony of flavors that could make even the most traditional cheese aficionado’s eyebrows rise in delight.
Festive Touch: During holiday gatherings, present these cookies on a decorative platter adorned with seasonal garnishes like cinnamon sticks or sprigs of rosemary. Not only does this add a festive touch, but the spices and herbs also subtly enhance the cookies’ aroma.
Gift Idea: These cookies make for excellent gifts. Stack them in a glass jar or a decorative tin, and tie it with a ribbon. Not only are they a treat for the taste buds, but they also carry that homemade, thoughtful charm that store-bought gifts often lack.
Midnight Snack: Finally, let’s not forget the beauty of enjoying these cookies as a secret midnight snack. Sneak one (or a couple) and relish the quiet moments of solitude with a comforting bite.
Whether presented simply or with a creative twist, these Brown Butter Toffee Cookies are sure to delight. Their versatility allows them to shine on any occasion, making every moment a little sweeter.
Troubleshooting Common Issues
Ah, the delightful dance of baking! Sometimes it feels more like trying to waltz with an octopus, doesn’t it? Let’s untangle some common hiccups you might encounter while making those scrumptious Brown Butter Toffee Cookies.
My Cookies Are Spreading Too Much!
It’s a classic conundrum. If your cookies are turning into one mega-cookie on the baking sheet, check the butter. When browning, it’s easy to get a bit carried away. Make sure to let it cool to room temperature before using it, so it solidifies slightly. Also, double-check your flour measurement. A kitchen scale is your best friend here—ensure you’ve got 260 grams (about 2 cups) of all-purpose flour. Lastly, refrigerate the dough for at least 30 minutes before baking. Patience is a virtue, especially with cookies!
My Cookies Aren’t Chewy!
If your cookies are coming out as hard as a hockey puck, first consider the sugar ratio. Brown sugar contributes to that chewy texture, so make sure you’re using 150 grams (3/4 cup) of it. Also, don’t overbake! The cookies should come out of the oven when they’re still a bit soft in the center—carryover cooking will do the rest. Aim for 10-12 minutes at 180°C (350°F).
The Toffee Bits Are Melting!
Oh, the sweet betrayal! Toffee bits can sometimes dissolve into the dough if they are too fine or if the oven temperature is too high. Ensure you’re using coarsely chopped toffee or pre-packaged bits designed for baking. Avoid baking at higher temperatures thinking it will expedite the process; slow and steady wins the race.
My Dough is Too Crumbly!
If your dough resembles more of a granola mix than cookie dough, it might be too dry. Double-check that you’ve added both the egg and the extra egg yolk, as these provide necessary moisture. If you’re still in trouble, add a tablespoon of milk to bring it all together.
Remember, even if your cookies aren’t perfect, they’re still made with love—and that’s what counts. Embrace the imperfections and enjoy the process. Happy baking!

Frequently Asked Questions
Can I use regular butter instead of brown butter in this recipe?
Absolutely, you can use regular butter, but you’ll miss out on the nutty, rich flavor that brown butter imparts. Browning the butter takes just a few extra minutes but transforms the taste profile of the cookies, adding depth and complexity that plain butter just can’t match. If you’re short on time, go ahead with regular butter, but if you can spare those minutes, trust me, your taste buds will thank you!
What should I do if my toffee bits melt into the dough?
Don’t worry too much if some toffee bits melt during baking; it’s quite common and adds a lovely caramelized edge to your cookies. However, to minimize melting, make sure your dough is properly chilled before baking. Pop the dough in the refrigerator for at least 30 minutes. This ensures the cookies hold their shape and the toffee bits stay intact as much as possible. If you’re using homemade toffee, ensure it’s broken into small, uniform pieces.
How can I store these cookies, and how long will they last?
Store your brown butter toffee cookies in an airtight container at room temperature. They’ll stay fresh and delicious for about 5 to 7 days. For longer storage, you can freeze them. First, place them on a baking sheet to freeze individually, then transfer them to a freezer-safe bag. They can last up to 3 months like this. Just let them thaw at room temperature or give them a quick zap in the microwave for that fresh-out-of-the-oven warmth.
Can I prepare the dough ahead of time?
Definitely! This dough is perfect for making ahead. You can prepare the dough and keep it in the fridge for up to 3 days before baking. If you need to keep it longer, portion the dough into balls and freeze them for up to 3 months. When you’re ready to bake, there’s no need to thaw; just add a couple of extra minutes to the baking time and keep an eye on them as they bake.
What can I use as a substitute for toffee bits?
If you can’t find toffee bits or prefer a different flavor, chocolate chips or butterscotch chips make excellent substitutes. For a nutty crunch, consider chopped pecans or almonds. Each option brings its unique twist to the cookies, but they all pair beautifully with the brown butter base. Just keep in mind that the texture and flavor will vary slightly with each substitution, but that’s part of the fun in baking, isn’t it?
Final Thoughts
And there you have it, the rich, nutty, and utterly irresistible world of Brown Butter Toffee Cookies! These cookies are more than just a treat; they’re an experience. Every bite is a delightful dance of flavors, from the deep caramel notes of the browned butter to the crunchy, buttery shards of toffee. It’s as if a symphony of sweetness is playing right in your mouth, and you’re the conductor directing the crescendo.
What makes these cookies truly special is the transformation of simple ingredients into something extraordinary. Browning the butter might seem like an extra step, but it’s a small effort with a massive payoff, bringing a depth of flavor that elevates these cookies to gourmet status. Trust me, once you start browning butter, it’s hard to stop. You might find yourself sneaking that nutty goodness into all sorts of recipes!
Remember, these cookies are incredibly forgiving. Don’t worry if your toffee pieces aren’t perfectly uniform or if your dough seems a bit too sticky; that’s just the cookies’ way of saying they want to spread out and be chewy. And if you find yourself craving a little extra flavor or texture, toss in a handful of chopped pecans or a sprinkle of flaky sea salt before baking. Your taste buds will thank you.
So, gather your ingredients, grab your trusty mixing bowl, and prepare to embark on a baking adventure that promises smiles and sweet memories. Once you pull these golden beauties out of the oven, let them cool just enough to hold their shape, then dive in. Don’t be surprised if they disappear faster than you can say “brown butter toffee”—they tend to do that.
Whether you’re sharing them at a gathering, gifting them to a friend, or simply indulging in a moment of self-care, these cookies are sure to bring joy. Happy baking, and may your kitchen always be filled with the warm, wonderful aroma of homemade cookies!


Leave a Reply