
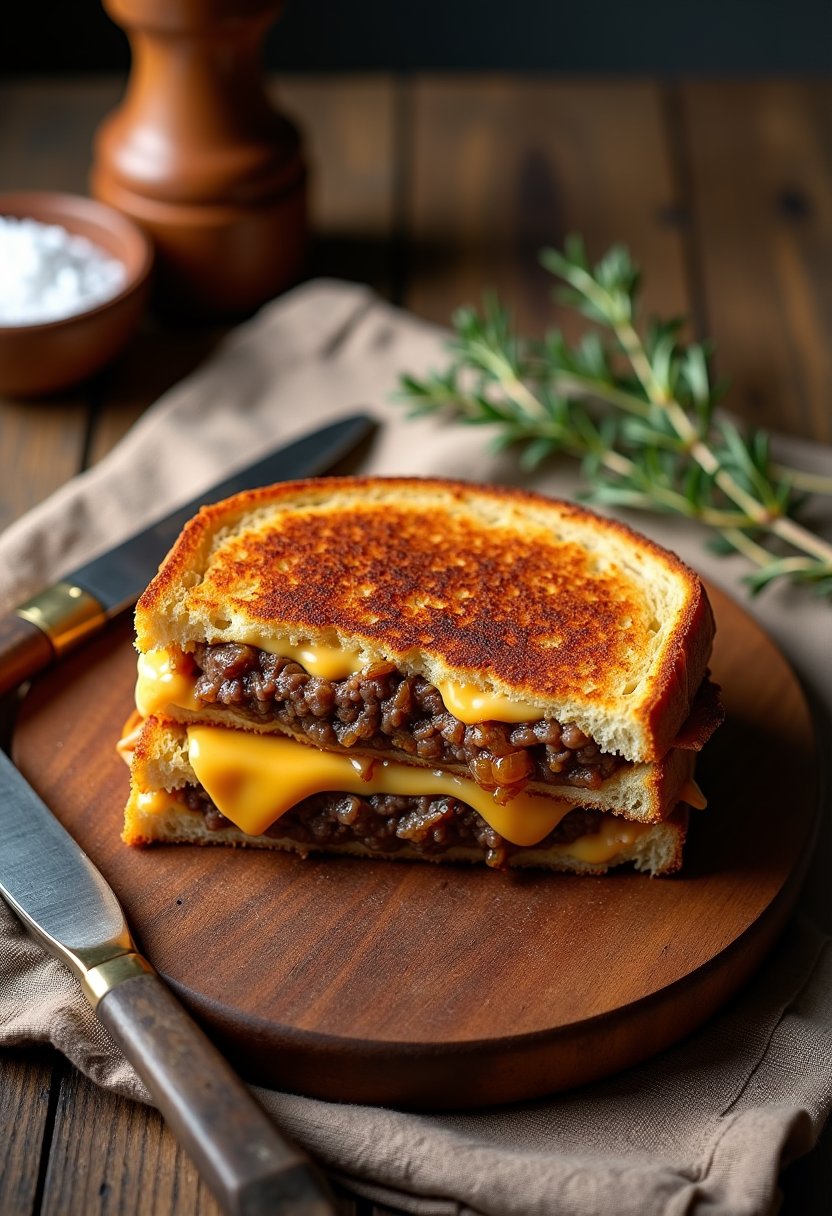
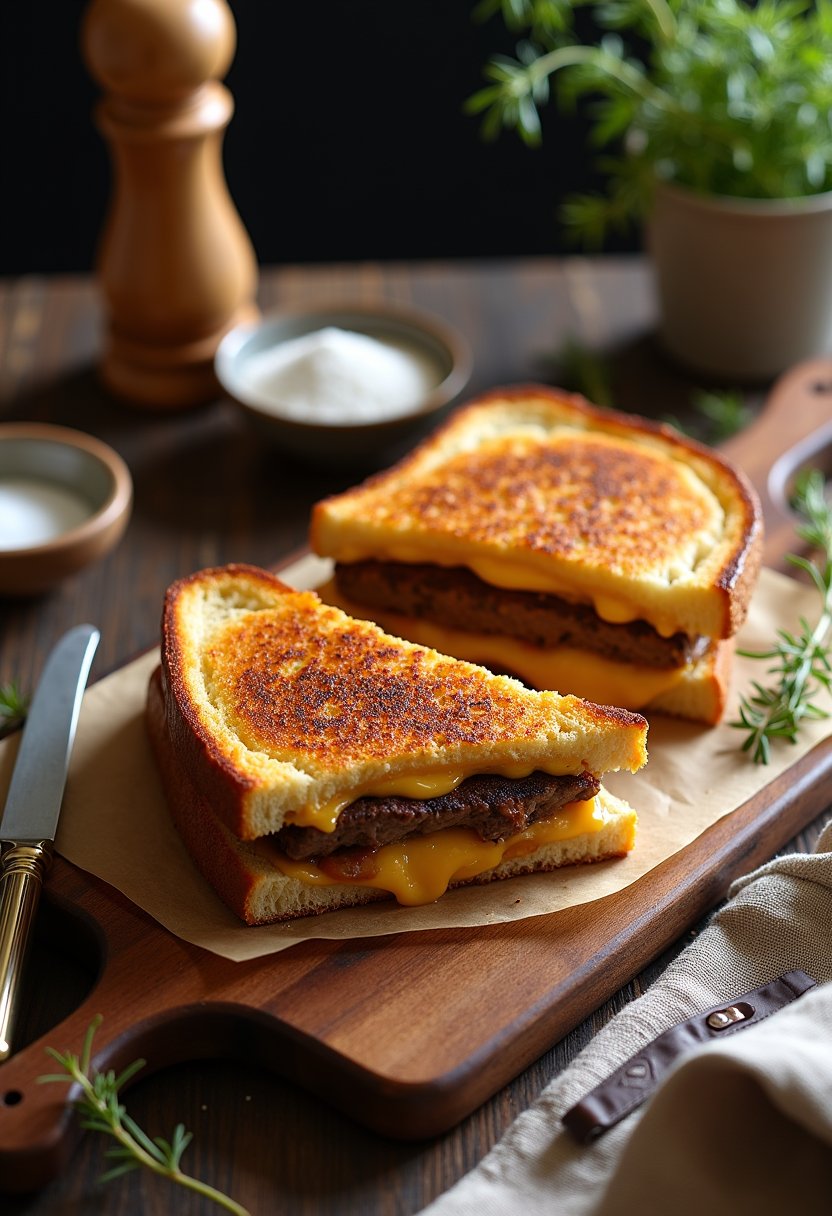
Picture this: a gooey, cheesy embrace nestled between two golden slices of perfectly toasted bread, cradling a juicy, flavorful beef patty with a hint of caramelized onions. Ah, the grilled cheese patty melt! It’s the culinary equivalent of a warm hug on a chilly day. This hybrid marvel combines the best of two beloved comfort foods—grilled cheese and hamburgers—into one irresistible sandwich that will have you questioning why you haven’t been making this all your life.
The magic of the patty melt lies in its harmonious blend of textures and flavors. Imagine biting into the crispy, buttery bread that gives way to a molten layer of cheese, only to be met with the savory richness of the beef patty. The onions add a touch of sweetness, creating a symphony of flavors that dance on your taste buds. It’s not just a meal; it’s an experience.
Why should you make this delectable delight? Well, aside from the fact that it might just become your new favorite comfort food, it’s also surprisingly easy to put together. With a preparation time of around 30 minutes and a cooking time of about 15 minutes, this recipe is perfect for both a quick weeknight dinner and an indulgent weekend treat. The difficulty level is beginner-friendly, so even if you’re not a seasoned chef, fear not! With just a few simple steps, you’ll be on your way to patty melt perfection.
So, whether you’re in need of a quick meal fix or looking to impress your friends with your culinary prowess, the grilled cheese patty melt is a surefire way to satisfy any craving. Ready to dive into a world of cheesy, meaty goodness? Let’s get cooking!
The Story Behind This Recipe
Ah, the grilled cheese patty melt—a sandwich that is a glorious testament to the power of comfort food. This culinary delight is an amalgamation of two American classics: the grilled cheese sandwich and the hamburger patty. But how did this delicious hybrid come to exist, you ask? Allow me to take you on a little journey through the annals of American diner history.
The grilled cheese sandwich has been a beloved staple since the early 20th century, when inexpensive sliced bread and processed cheese became widely available. Meanwhile, the hamburger, ground beef’s crowning achievement, was making its own way into the hearts and stomachs of Americans, particularly with the boom of roadside diners in the mid-1900s. Enter the patty melt, a creation that beautifully bridges these two beloved sandwiches.
Legend has it that the patty melt was born in the 1940s or 1950s, with its origins often attributed to the bustling diners of Southern California. Some stories point to Tiny Naylor, a Los Angeles restaurateur, while others nod in the direction of the now-iconic chains like Denny’s. Regardless of who first had the brilliant idea to slide a juicy hamburger patty between slices of golden, buttery bread, layered with gooey cheese and caramelized onions, the patty melt quickly became an American diner staple.
The beauty of the patty melt lies in its versatility. It can be customized to suit any palate—whether you prefer hearty rye bread or a more delicate sourdough, sharp cheddar or creamy Swiss cheese, the possibilities are endless. Each bite is a delightful explosion of textures and flavors, from the crispy crust of the bread to the savory richness of the beef patty and the sweet, soft onions.
In many ways, the grilled cheese patty melt is a celebration of American ingenuity in the kitchen. It’s a dish that invites creativity while staying rooted in its comforting, nostalgic origins. So, whether you’re a diner aficionado, a cheese enthusiast, or just someone with a penchant for all things delicious, this recipe is sure to hit the spot.
Ingredients
Ah, the Grilled Cheese Patty Melt, where the humble grilled cheese meets the savory beef patty in a spectacular culinary love affair. Here’s what you’ll need to create this mouthwatering delight:
For the Beef Patties:
- 500g (about 1 lb) ground beef: Opt for an 80/20 meat-to-fat ratio for juicy patties. If you’re feeling fancy, a blend of chuck and sirloin can elevate the flavor.
- 1 teaspoon salt: Sea salt is preferable for its clean taste, but table salt will work in a pinch.
- 1/2 teaspoon freshly ground black pepper: Freshly ground is key for that robust kick.
For the Caramelized Onions:
- 2 medium onions, thinly sliced: Yellow onions are the sweet stars here, but white can substitute.
- 2 tablespoons butter: Unsalted is best, providing a luscious base for caramelization.
- 1 tablespoon olive oil: This helps prevent the butter from burning—teamwork makes the dream work!
For the Sandwich:
- 8 slices rye bread: Authentic patty melts love rye, but sourdough or a hearty white bread can step in if needed.
- 8 slices Swiss or Cheddar cheese: Swiss offers a nutty, mild taste, while Cheddar packs a sharper punch. Use your cheese intuition!
- 4 tablespoons butter, softened: Again, unsalted is your friend here, ensuring a golden, crispy crust without added saltiness.
Optional Garnishes:
- Pickles: Dill slices for a tangy crunch.
- Mustard or mayo: For those who like a little extra zing.
Notes:
- Quality Matters: With such simple ingredients, quality is key. Choose fresh, high-quality beef and cheese for the best results.
- Bread Choices: If you can’t find rye, any good-quality, sturdy bread should suffice. Avoid anything too soft or airy, as it needs to hold up against all that glorious filling.
Now that you’re armed with this list, it’s time to roll up your sleeves and get ready to create a melt so delicious, it might just become your new comfort food staple.
Step-by-Step Instructions
- Prepare the Ingredients
Start by gathering all your ingredients in one place—like a culinary battalion ready to march. You’ll need 500g (1 lb) of ground beef, 8 slices of rye bread, 4 slices of Swiss cheese, 1 large onion, and 60g (4 tablespoons) of butter. If you like a little zing, add a pinch of salt and pepper to the beef, or consider a dash of Worcestershire sauce for an umami boost. - Shape the Patties
Divide the ground beef into four equal portions. Shape each portion into a patty slightly larger than your slices of bread. Remember, these will shrink a bit as they cook. Season each side generously with salt and pepper. You want them to be flavorful little discs of joy. - Caramelize the Onions
Slice the onion thinly, like you’re auditioning for a cooking show. In a skillet over medium heat, add 30g (2 tablespoons) of butter. Once melted and shimmering, add your onions. Cook, stirring occasionally, until they are golden-brown and caramelized, about 15-20 minutes. Your kitchen should start to smell like heaven at this point. - Cook the Patties
In a separate pan, heat over medium-high heat. Once it’s hot, place the patties in, leaving a little space between them. Cook for about 3-4 minutes on each side, or until they reach an internal temperature of 70°C (160°F). The patties should be nicely browned and juicy, with a slight crust on the outside. - Assemble the Sandwich
While the patties are resting (yes, they deserve a break), lay out four slices of rye bread. Top each with a slice of Swiss cheese, then place a patty over the cheese, followed by a generous heap of caramelized onions. Top with another slice of cheese and cover with the remaining bread slices. - Grill the Patty Melts
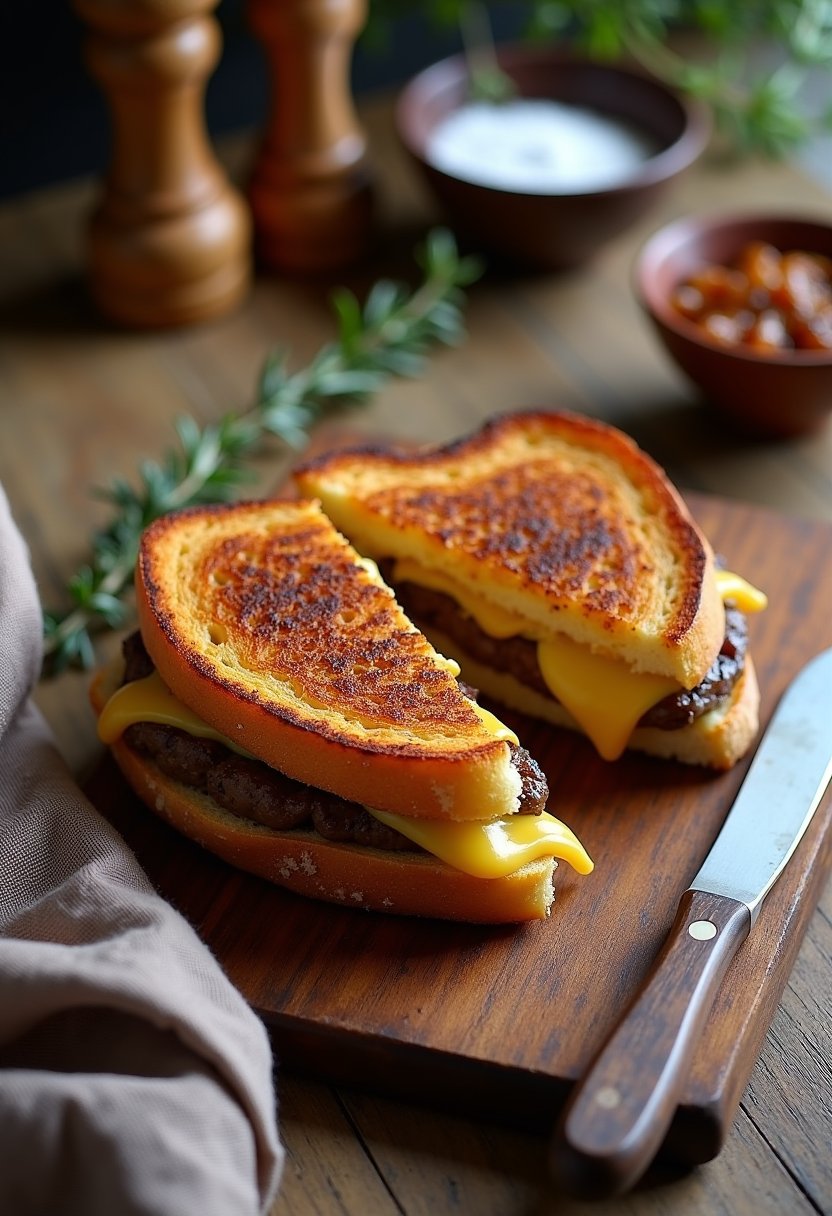
Wipe out the skillet used for the onions and melt the remaining 30g (2 tablespoons) of butter over medium heat. Carefully place each sandwich in the pan. Press down gently with a spatula to ensure good contact. Cook for about 3-4 minutes on each side, until the bread is golden brown and the cheese is melted, oozing just slightly from the edges. - Serve and Enjoy
Remove the patty melts from the pan and let them rest for a minute or two. This allows the flavors to marry and the cheese to settle slightly. Slice each sandwich in half, diagonally if you want to be fancy, and serve immediately. Watch out for that first bite—these beauties will be hot but oh-so-delicious!
Tweaks and Additions
If you’re anything like me, you see a recipe as more of a friendly guideline than a strict rulebook. The beauty of a Grilled Cheese Patty Melt is its versatility, allowing you to tweak and transform it to suit your unique tastes or dietary needs. Here are some mouth-watering variations to try:
1. Veggie Delight Patty Melt
For our plant-loving friends, swap out the beef patty for a hearty portobello mushroom or a well-seasoned veggie burger. A portobello mushroom, marinated in balsamic vinegar and garlic, offers a juicy, umami-rich alternative that grills beautifully. This version maintains the same cooking time, but you’ll want to ensure your mushroom or veggie patty reaches a safe internal temperature of at least 75°C (165°F).
2. Spicy Jalapeño Kick
If you’re a fan of heat, consider adding sliced jalapeños or a spicy pepper jack cheese to your melt. The peppers bring a zesty punch that plays deliciously against the creamy cheese and savory patty. This variation won’t change your cooking time, but be sure to place the jalapeños on the cheese side, so their flavor infuses as it melts.
3. Gluten-Free Goodness
For a gluten-free twist, use your favorite gluten-free bread. Make sure it’s a sturdy variety that can hold up to grilling. The cooking technique remains the same, but keep an eye on your bread as gluten-free options can toast more quickly. This allows everyone at the table to enjoy a delightful patty melt without the gluten.
4. Mediterranean Spin
Transport your taste buds to the sunny shores of the Mediterranean by adding a layer of roasted red peppers, a sprinkle of feta cheese, and a dash of oregano. The sweet, tangy peppers and creamy feta add a delightful complexity. Watch out for the feta—it melts differently than typical cheeses, so you might want to finish the sandwich under a broiler for a golden top.
5. Breakfast Patty Melt
Why not start your day with a patty melt? Swap the beef patty for a breakfast sausage patty and add a fried egg. The runny yolk transforms the melt into a breakfast dream. This version requires a little timing finesse—cook the sausage and egg separately before assembling the melt. You may need to adjust the grilling time slightly to ensure everything is heated through.
Remember, the key to a great patty melt is balance—each element should complement the others, creating a symphony of flavors and textures in every bite. So, go ahead, give these variations a whirl, and let your culinary creativity shine!
Frequently Asked Questions
Can I use any type of cheese for my Grilled Cheese Patty Melts?
Absolutely! The beauty of a Grilled Cheese Patty Melt is its versatility. While the classic choice is Swiss cheese, you can use cheddar, provolone, or even a spicy pepper jack for a kick. If you’re feeling adventurous, try mixing cheeses for a complex flavor profile. Just remember, the cheese should melt smoothly to achieve that gooey, irresistible texture. If you’re lactose intolerant, there are excellent lactose-free and vegan cheese options available too.
What type of bread works best for a Patty Melt?
Traditionally, rye bread is the star of the show with its robust and slightly tangy flavor that pairs perfectly with the savory beef patty and melted cheese. However, if rye isn’t your thing, sourdough or a hearty whole wheat bread can also do the trick. The key is to use a bread that can hold up to the juicy patty and melt without falling apart.
How do I prevent my Patty Melts from getting soggy?
Ah, the dreaded soggy melt! To avoid this, make sure to adequately toast your bread. Start by buttering the outsides of the bread slices, and grill them over medium heat until golden brown and crisp. Additionally, cook your beef patty thoroughly to reduce excess moisture. Finally, let the cooked patty rest for a minute before assembling to allow the juices to redistribute.
Can I prepare Patty Melts ahead of time?
Certainly! You can prepare the beef patties and caramelize the onions in advance. Store the cooked patties and onions separately in airtight containers in the refrigerator for up to two days. When you’re ready to eat, assemble the sandwiches and grill them freshly for the best texture and flavor. Keep in mind, freshly grilled is always best for that perfect crunch.
What’s the best way to reheat leftover Patty Melts?
Reheating these beauties while maintaining their delightful crunch can be a bit tricky, but not impossible. Avoid the microwave, as it tends to make the bread soggy. Instead, reheat them in a preheated oven at 180°C (350°F) for about 10 minutes, or until warmed through. Alternatively, a quick sizzle on a skillet over medium heat can revitalize that crispy exterior while keeping the interior warm and cheesy.
Final Thoughts
As you take that first glorious bite of your homemade grilled cheese patty melt, you might find yourself doing a little happy dance. It’s okay; you’re in good company. This symphony of gooey cheese, juicy beef, and perfectly toasted bread is enough to make anyone’s taste buds sing an aria. The combination of savory, melty, and crispy elements creates a culinary trifecta that’s, quite frankly, irresistible.
Remember, this recipe is as much about technique as it is about ingredients. Mastering the art of the perfect sear on your beef patty is key. Don’t rush it; let it develop that flavorful crust. Trust me, your patience will be rewarded. And when it comes to the cheese, feel free to mix things up. While a classic cheddar is a go-to for a reason, adding a slice of creamy Havarti or sharp Swiss can elevate your melt to new heights of decadence.
If you find yourself without rye bread, don’t fret. A sturdy sourdough or even a whole grain can hold up beautifully to the robust flavors and maintain its structural integrity under the pressure of all that wonderful melty goodness.
Most importantly, this recipe is an invitation to experiment. Perhaps next time, you’ll add caramelized onions, a slather of spicy mustard, or even a slice of tomato for a bit of brightness. Whatever you choose, know that you’ve got a recipe that’s as flexible as it is delicious.
In the world of sandwiches, the grilled cheese patty melt is like the cool kid everyone wants to hang out with. It’s comforting yet exciting, familiar yet novel. And now, armed with your newfound patty-melting prowess, you’re ready to impress at your next lunch gathering or simply treat yourself to a solo dining triumph. So go ahead, whip up another round, and enjoy the delicious fruits of your labor. Because in the end, isn’t that what the best meals are all about?


Leave a Reply